This is the first post in my series on editing photos using GIMP. For a full list posts in my series on editing images or other topics, check the “Curriculum” link on this page. This post is about fixing problem areas in a photograph by using the clone tool in GIMP. Other photo editors have similar tools, but for simplicity I will be demonstrating using GIMP.
The clone tool is one of my favorites for editing images. How many times have you taken a photograph, but had something unfortunate sitting in it? I will be demonstrating with an image of a blue sky with a power line stretched across it. The clone tool is excellent for fixing this type of problem. The clone tool copies the pixels from one spot on the image, called the “sample”, and allows you to place them anywhere else on the image. You can cover up the problem by replacing it with small sections of other parts of the picture. However, it does have some limitations. It works best at filling in areas surrounded by the same color. You cannot use this tool to fill in details, like faces or patterns. It works very well for removing the piece of lint on someone’s clothing or a fly on the table.
If you would like to follow along, you can download the image below by clicking this link and saving the image to your computer, and experiment with cloning using your download of GIMP. Or you can use a picture in your computer to try the same techniques.
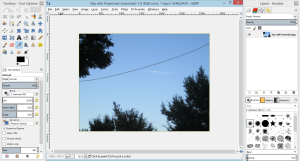
First, open the image that you would like to work with in GIMP.
This picture is an excellent candidate for using the clone tool, because the cable is surrounded by sky that is all roughly the same color.
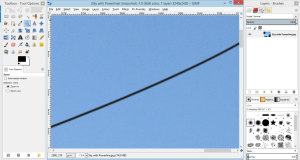
Next, zoom in tightly on a part of image with the power line. You can do this by selecting the magnifying glass icon in the tool box and clicking on the image or by pressing the Z key on your keyboard. The program zooms in by default, but you can switch to zooming out by pressing and holding the Ctrl key while clicking.
Here is a zoomed in version of the same image. You will notice that the magnifying glass is selected, and that it is set to zoom in.
Then select the clone tool. You can do it by clicking the small icon that looks like a stamp, or by pressing the C key on your keyboard.
Once you have selected the clone tool, you need to set a source. This is where you will be copying from. For this picture, you want to set your sample in the area of blue near the power line so that when you remove it, it is replaced by the same color of blue.
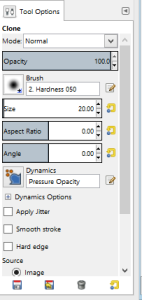 This is the tool options dialogue, where you set the size of the cloning brush. It will appear on the lower left-hand side of your screen, below the toolbox. I prefer smaller sizes, and brushes with some transparency on the edges, but that is a matter of personal preference. For this lesson, I will stick with the defaults. However, you may wish to experiment with larger or smaller or different shaped brushes.
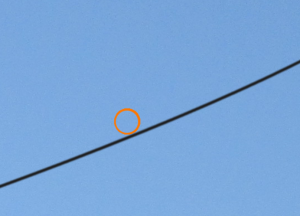
Once you have picked a brush that you like, hold down the Ctrl key, and click on the location on the picture you would like to copy from. There will be a dashed area surrounding the sample location. For my first section, I am going to take a sample from the area within the orange circle.
I am going to use that sample to fix the area immediately below it. Once you have your sample, just click on the area you want to copy. It may take a few clicks to fully erase a bit of the line.
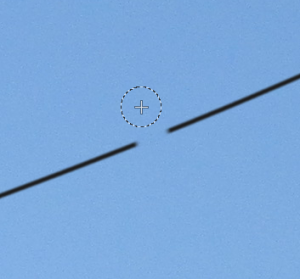
This is what it looks like after the first bit of power line is removed. Because I am using a fairly small brush, it took five or six clicks to remove a space that size. However, notice how nicely the removed area blends into the sky behind it.
Once you have fixed a small area, move your sample location and start working on the next spot. To move your sample, just hold down Ctrl and click on a new location. Move your sample often. It is not obvious, but there are significant color shifts due to lighting even on what you would think of as a surface that is only one color.
Also, if you click and drag your cursor, the sample moves with it. Try it out. Set your sample and then click and drag your cursor across the power line. The sample moves with it. This is useful in some cases, but may not always work, particularly if you are working with a background that has distinct areas of color.
You can repeat what we just did until the entire power line is erased and all you have is a clear blue sky.
How did yours turn out?
Using the cloning tool takes a bit of practice, but is a very easy way to do simple fixes on photos. I hope you enjoyed this tutorial, and please post questions in the comments section!
